Build Your Webpage
Yay, you’re now ready to start building your first real webpage. A website of your choice. I think you’re already pretty far a head… Let’s finish the webpage.
We encourage you to style your webpage with your own look and feel.
1. Create a top section
Let’s start with building the top section of the page. We made a quick drawing of how it could look. Feel free to add more elements if you like.
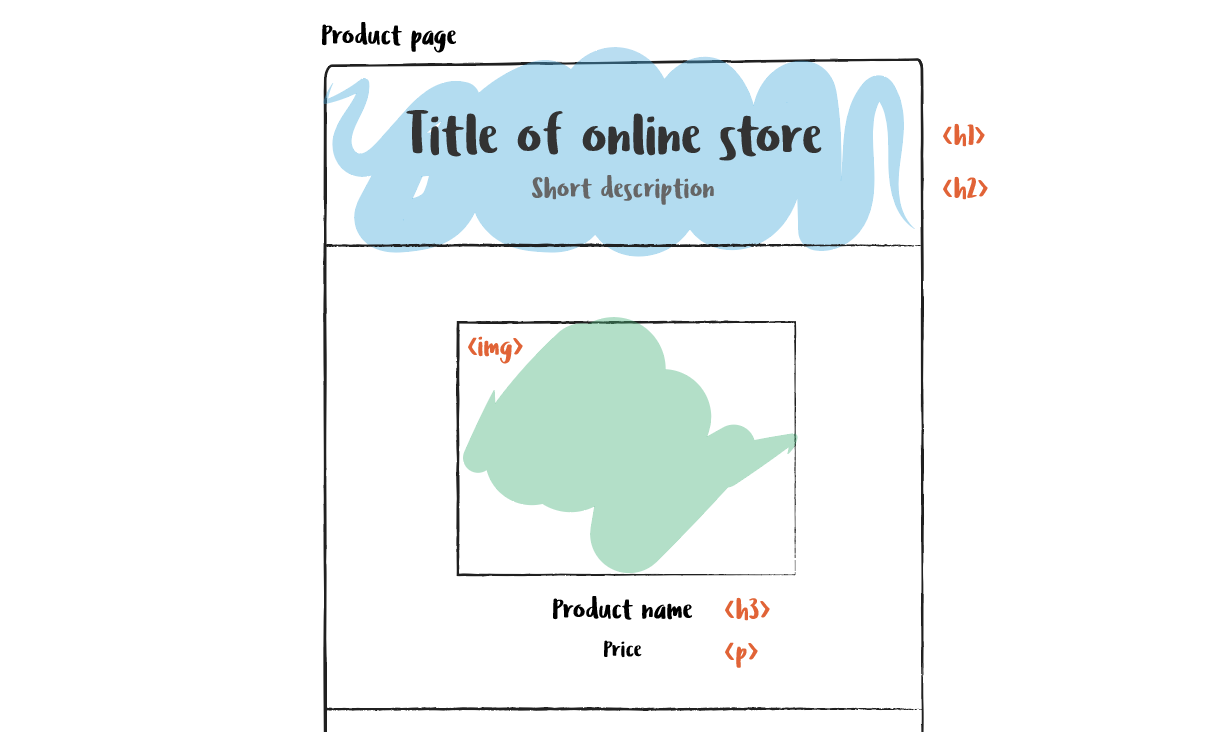
1.1 Create a <h1> with a title of your choice. Center the text.
1.2 Create a <h2> with a description. Center the text.
1.3 Add a picture. Center the image.
1.4 Create a <h3> with a product name. Center the text.
1.4 Create a <p> with price.
1.5 Style the top section in CSS
A great way to bring some air into your design is to work with margins. Margins sets a distance to the next element. Read more about margins here.
Don’t forget to save. Open Sublime on your computer and copy all of your code into that file, save the file and name it to index.html.
2. Create a section with related products
Let’s move on and start working with the related products section.
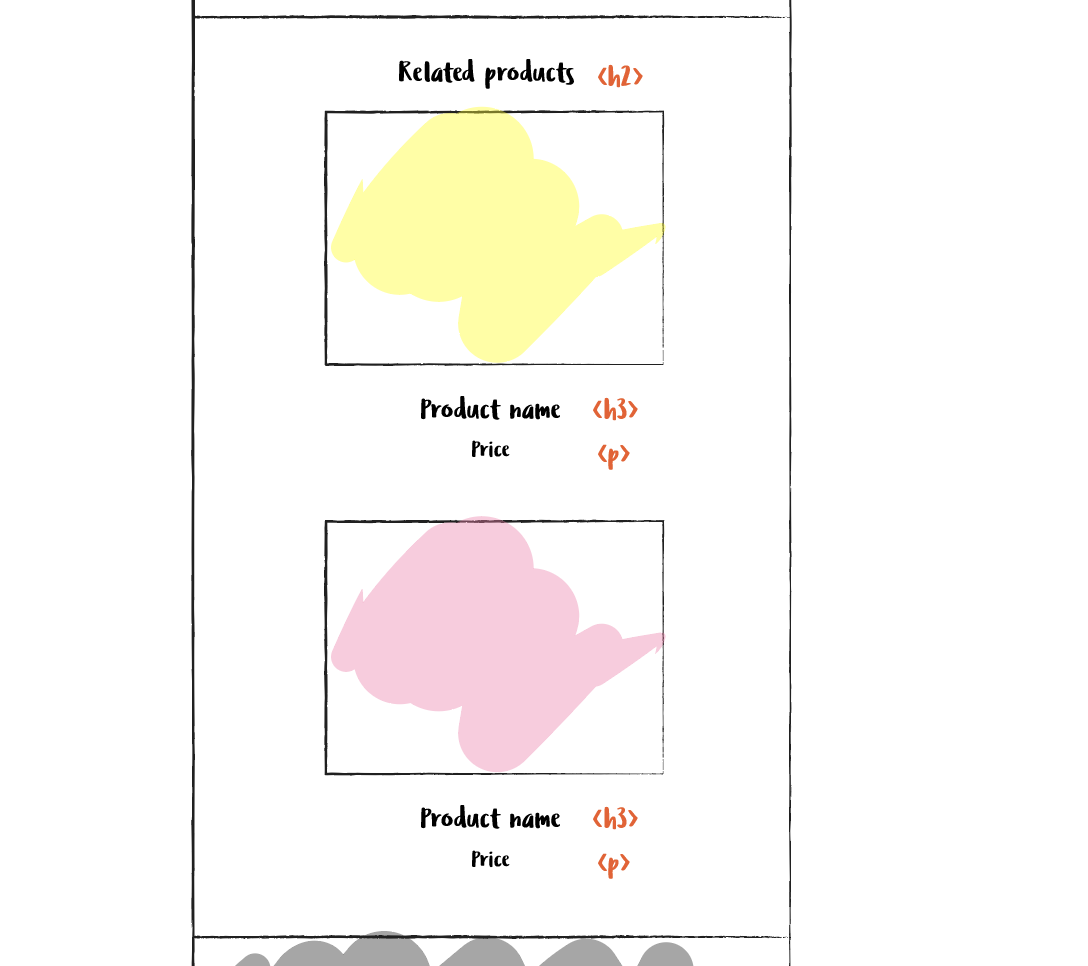
2.1 Start by creating a <div> for this section.
2.2 Add a <h2> tag as a title of this section. The headline should be inside the div.
2.3 Add a <img> with a link to an image online.
2.4 Add a <h3> with a product name.
2.5 Add a <p> with price.
2.6 Now you have the problem that all your text elements looks the same. Maybe you want these specific ones to have a different color, for example blue? Remember how you styled a specific tag?
Add a unique class to the h2 and p tags that are inside the div. Style these with CSS to get the look you want.

.blue-paragraph {
  color: blue;
}
2.7 - Style your product page with CSS.
Don’t forget to save. Open Sublime on your computer and copy all of your code into that file, save the file and name it to index.html.
Voilá - time to publish your webpage. GOOD JOB!!!
Are you already Done?
A few extra suggestions to make your webpage even better.
Add a contact section
Let’s try and add a contact section.
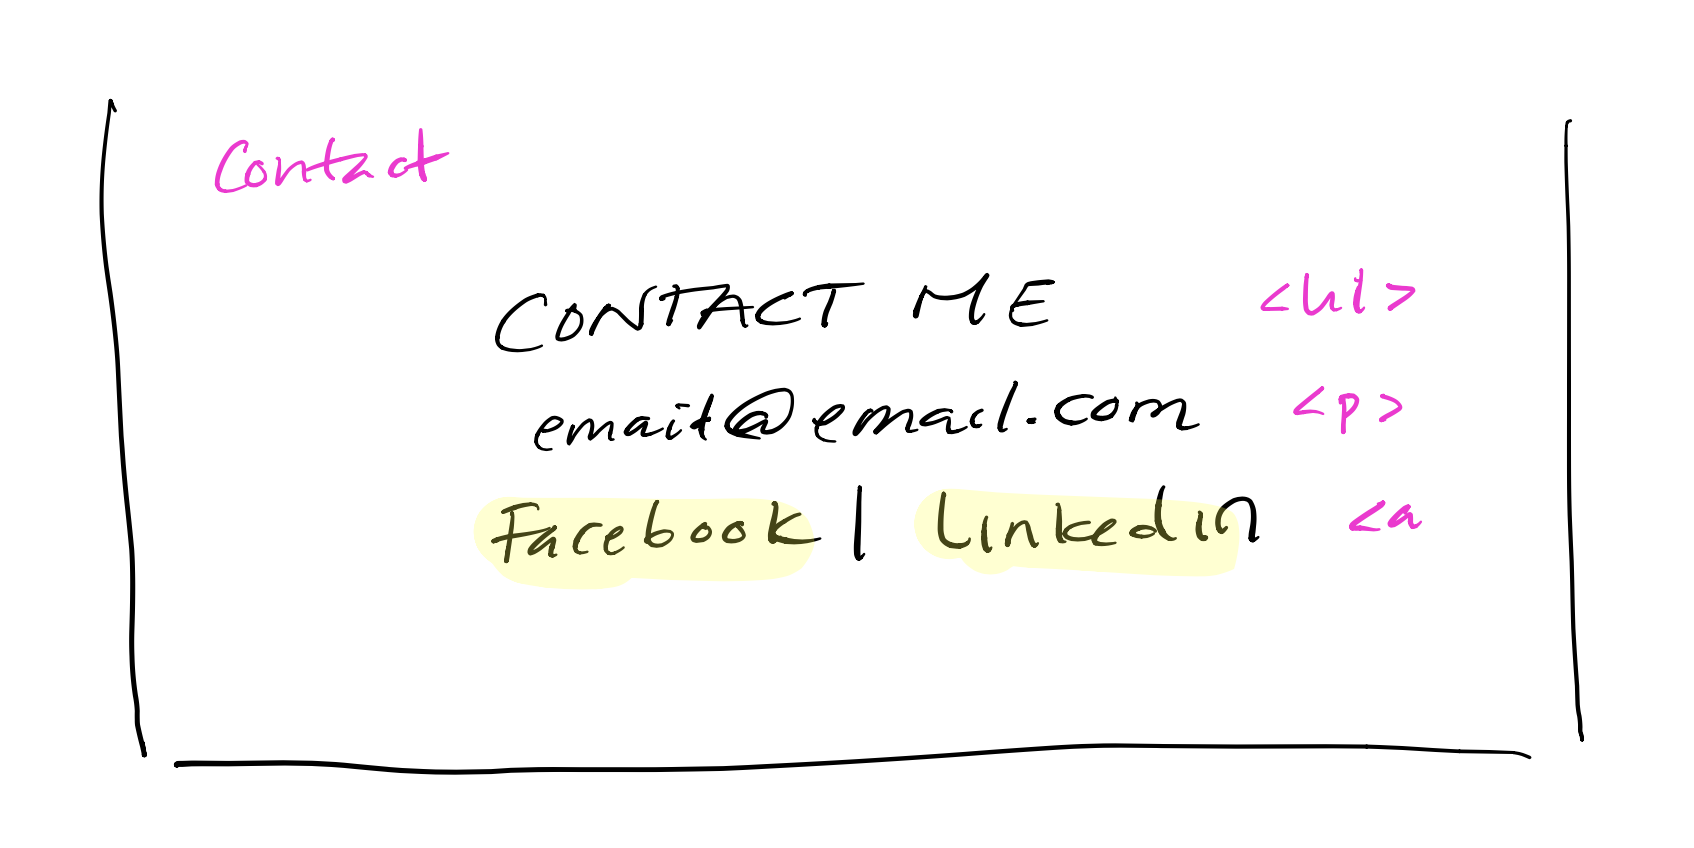
1 - Add a <h1> tag with a title for the section.
2 - Create a <p> tag with email adress or other contact information.
3 - Add two links <a> to social media profiles.
This will create a section for contact information.
More styling
1 - Wrap some words with <span> and set another color to those words.
2 - Work with margins and choose a font of your choice.
3 - For your social media div - create a nice hover effect with CSS.
4 - Add a ‘Buy now’ button and style it with a hover effect.
5 - Try to view your page on a mobile phone. Not looking how you want it? You can use something called media queries. To style your page differently depending on screen size. Here’s an example. Read about media queries and style your product page for mobile, tablet and desktop.
6 - When you’re done with your product page, go ahead and create a new page with all products on it. Link the right product to your product page. Like this: